UniWave Electric UniWave Electric

How to Safely Replace a Burnt Out Contactor Coil?

Time:2026-07-27 Author:Sophia
0%

When dealing with electrical systems, safety is paramount. Knowing how to replace a burnt out contactor coil safely can prevent hazards like shocks or fires. Renowned electrical engineer John Smith emphasizes, “Always prioritize safety when handling electrical components.” His expertise highlights the importance of proper procedures.

Replacing a burnt out coil involves several steps. First, ensure the power supply is disconnected. This reduces the risk of electric shock. Next, carefully remove the faulty coil. Pay attention to the connections and surrounding components. It’s crucial to understand the wiring before proceeding. Mistakes can lead to bigger issues.

Many individuals underestimate the complexity of this task. Having the right tools and understanding the specific model can make a difference. If in doubt, consulting a professional is wise. After all, ensuring that you can safely replace a burnt out contactor coil is not just about fixing a problem; it’s about protecting yourself and your home.
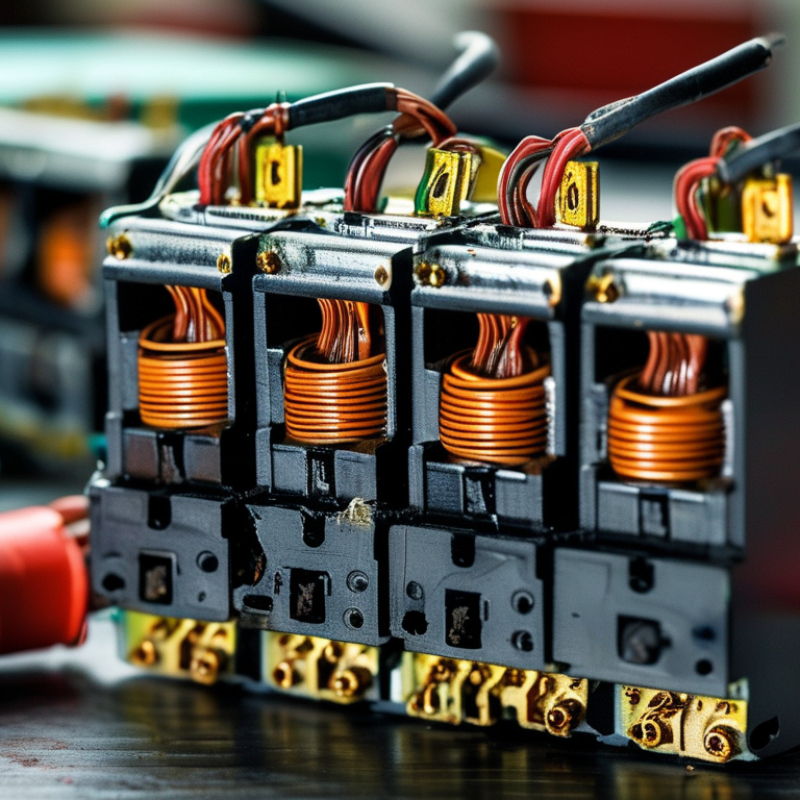
How to Safely Replace a Burnt Out Contactor Coil?

Understanding the Function of a Contactor Coil and Its Components

A contactor coil plays a critical role in electrical systems by controlling the flow of electricity. When energized, the coil generates a magnetic field that pulls the contactor's armature, closing the circuit. This mechanism allows for the operation of motors, lights, and other devices without needing manual intervention. Understanding this function is essential for troubleshooting and maintenance.

Components of a contactor coil include the coil itself, armature, springs, and contacts. The coil is usually made of copper wire, wound tightly to form magnetic loops. The armature is a movable part that connects or disconnects circuits. Springs return the armature to its default position when the coil is de-energized. Each part must be in good condition to ensure reliable operation.

Burnt-out coils indicate an electrical issue, often caused by overloads or poor connections. Inspect these components carefully to prevent future failures. Reflecting on past experiences can reveal patterns that help in preventive maintenance. Regular checks on these elements create a more efficient system and reduce unexpected downtime.

Identifying Signs of a Burnt Out Contactor Coil

When dealing with a burnt-out contactor coil, the signs can be quite telling. One of the most common indicators is the inability of the contactor to engage. If you notice that the contactor fails to close, it's a clear sign of trouble. Often, you might hear a clicking sound as the coil attempts to work. This noise signifies an electrical issue rather than a functioning unit.

Another sign is visible damage. Look for discoloration or burnt spots on the contactor itself. You might also see melted components nearby. This can happen due to abnormal heat. If the coil feels excessively hot to the touch, it's time to investigate further. Unusual odors may accompany these signs, often resembling burnt plastic or rubber. These smells usually indicate that insulation is degrading, which compromises safety.

Pay attention to fluctuating performance as well. The contactor might cycle on and off erratically. This inconsistent behavior can lead to inefficient operation of the connected devices. Addressing these issues quickly can prevent further damage and ensure safety. It's essential to consult with a professional when signs are evident. Understanding these warning signs can help you avoid hazardous situations and maintain system integrity.

Safety Precautions Before Replacing the Contactor Coil

Before attempting to replace a burnt-out contactor coil, safety precautions are critical. Start by disconnecting all power sources to the equipment. Use a multimeter to confirm that there is no electrical current. This step is essential; even a small shock can be dangerous. Ensure the workspace is dry and free of conductive materials.

When working with electrical components, wear appropriate personal protective equipment (PPE). Insulated gloves help protect against accidental shocks. Safety goggles should shield your eyes from any potential debris. It’s also wise to have a first aid kit nearby. Accidents can happen, and being prepared is part of being safe.

Consider the environment. Make sure the area is well-lit to avoid mishaps. Remove any clutter that might obstruct your work. Focus is vital, as distractions can lead to mistakes. Reflect on your experience; even seasoned professionals can overlook key safety steps when rushed. Take your time with each part of the process to ensure everything is done correctly.

Step-by-Step Guide to Replacing a Contactor Coil

Replacing a burnt-out contactor coil can seem daunting, but it can be done safely with the right steps. Start by ensuring that the power is completely turned off to avoid any electrical hazards. Use a multimeter to confirm there is no voltage present before you begin working.

Carefully remove the cover of the contactor. Take note of how the wires are connected. It can be helpful to take pictures for reference during reassembly. Disconnect the wires attached to the burnt contactor coil. Make sure to label them if needed. Then, remove the old coil from the contactor.

When it comes to installing the new coil, ensure that it matches the voltage specifications of the previous coil. Securely connect the wires, following the same configuration noted earlier. Tighten them properly to avoid any loose connections that may cause future issues.

Tips: Always wear insulated gloves when working with electrical components. This minor detail can prevent potential shocks. Keep a tidy workspace to avoid losing small parts during the process. Avoid rushing; take your time to double-check every connection. Mistakes can happen, and taking a moment to reflect can save you future headaches.

Testing the New Contactor Coil and System Functionality

When replacing a burnt-out contactor coil, testing the new coil and system functionality is crucial. Begin by ensuring power is disconnected. Verify the wiring connections for damage or corrosion. Use a multimeter to test the resistance of the new coil. Typical values range between 30 to 60 ohms for most coils. If the resistance is outside this range, reconsider installation.

After installation, re-energize the system gradually. Monitor how the contactor operates under normal conditions. Listen for unusual sounds. A humming noise may indicate misalignment or a low voltage supply. According to a report from the National Electric Manufacturers Association, nearly 25% of contactor failures arise from improper testing after installation. This highlights the importance of thorough checks.

Next, observe the system's time delay and operational response. The contactor should engage within a few seconds. Delays longer than ten seconds could signal underlying issues. Record any anomalies and review system documentation. Regular maintenance checks can prevent future failures. Ensuring optimal functionality takes diligence and expertise. Aim for reliability; minimizing errors protects both equipment and personnel.

FAQS

: What is the primary function of a contactor coil?

: A contactor coil controls the flow of electricity by generating a magnetic field.

What does the coil do when energized?

It pulls the armature, closing the circuit, enabling device operation.

How can I tell if a contactor coil is burnt out?

Common signs include the inability to engage or unusual clicking sounds.

What visible signs indicate coil damage?

Look for discoloration, burnt spots, or melted components on the contactor.

Why is it essential to inspect components regularly?

Regular checks help prevent failures and reduce downtime by maintaining system efficiency.

What safety measures should I take before replacing a coil?

Disconnect power sources and confirm with a multimeter to ensure no current flows.

What personal protective gear is recommended when working with electrical components?

Wear insulated gloves and safety goggles to protect against electric shocks and debris.

How should the work area be prepared for coil replacement?

Ensure the space is dry, well-lit, and free of clutter to avoid accidents.

What should be done if the coil feels excessively hot?

Investigate immediately, as it can indicate serious electrical problems.

Why is focusing on safety steps important?

Rushed work can lead to critical mistakes, even for experienced professionals.

Conclusion

Replacing a burnt out contactor coil can be a straightforward process if approached with caution and understanding. First, it is essential to comprehend the role of a contactor coil and its integral components in an electrical system. Recognizing the symptoms of a burnt-out coil, such as unusual noises or system failures, will guide you to take timely action. Before attempting the replacement, ensuring safety precautions are followed is crucial to protect against electrical hazards.

In the step-by-step guide to replacing a contactor coil safely, it is important to disconnect power, carefully remove the faulty coil, and install the new one while adhering to proper wiring practices. Once the replacement is complete, testing the functionality of the new contactor coil and the overall system is vital to ensure everything operates smoothly. By following these guidelines on how to replace a burnt out contactor coil safely, you can effectively restore your system’s performance while minimizing risk.

Sophia

Sophia

Sophia is a dedicated marketing professional with an exceptional depth of knowledge about her company's products and services. With a keen understanding of market trends and customer needs, she crafts insightful blog posts that not only inform but also engage readers, enriching the company’s online......